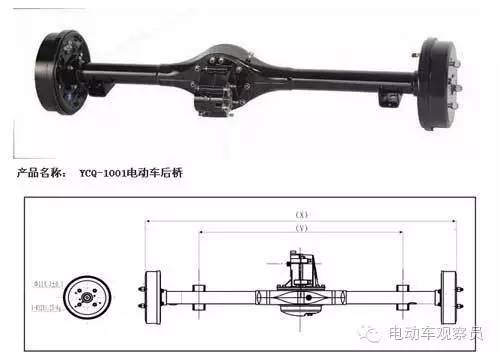
Step 1: spray loose lubricant on the disassembly screws to help the disassembly. The loose parts to be derusted are: half shaft screw, single side steel wire, brake pull rod wire... Disassemble it in a few minutes, and the screw will be easier to disassemble.
Step 2: it is not easy to forcibly disassemble the half shaft screw. Take the half shaft "pin" straight and remove it with a vice. Some screws are relatively tight and cannot be disassembled with brute force. It is easy to screw out the screw grain and slip the edge, causing trouble. The circumference of the half shaft screw is mostly with "groove" wire, which can be vibrated with a "flat chisel" and a hammer, which will bring convenience to the disassembly.
Step 3: screw off the half shaft screw, remove the internal spring gasket, screw the half shaft screw parallel to the shaft, and knock with the parallel force of the hammer. It is easy to remove the wheel.
Step 4: remove the steel plate screws. The steel plate screws only need to be removed on one side. Most of the screws here are anti-skid wires, which brings "strength" to the disassembly. They can be removed with a ring wrench or socket to avoid screwing the wires, and all the "U" wires and steel plate cover plates of the steel plate can be removed.
Step 5: remove the brake pull rod and large frame pull rod scale, and inject a little oil into the removed screws for easy installation.
Step 6: the screws connecting the differential with the "external name" of the half shaft are all hexagonal wires. After using the hexagonal wires, it is inevitable that there will be foreign matters such as oil sludge inside the hexagonal wires, which will bring difficulties to disassembly. You can use a sharp awl to clean out the "dirt" of the hexagonal wires on both sides, so as to better insert the hexagonal wrench into the bottom of the hexagonal wires to prevent slipping and injury!
Step 7: separate the differential from the axle shaft and "remove" the motor from the differential. Observe whether the external weighing hole of the "connecting" half shaft of the differential is "several eyes", and whether the eyes on both sides are symmetrical or inclined. Make sure to replace the new differential with the old one, so as to avoid trouble caused by non matching.
Step 8: installation. When the motor is installed to the differential package, it is best to apply some sealant around the circumference to prevent water or oil leakage. The motor connecting differential screws, steel plate screws and half shaft screws must be tightened to prevent the danger caused by loose screws.
Step 9: add gear oil. There must be gear oil in the differential, and inform the customer that the gear oil of the new differential should be replaced once every two months, and then every six months. Your maintenance should be good, so that it has less faults.
Previous One : Conservation knowledge
Online message